
Ultimate guide to handle issues: No Atomizer, Atomizer Short and Check Atomizer
Most of the issues that vaporizers face is the outcome of badly performing atomizers. Atomizers are the heating mechanism of vaporizers that are designed to heat up the vape juice. Upon provision of heat, the vape juice is converted into the sought-after vapor clouds that we love to inhale. It is not unusual for a careless smoker to receive the messages like "NO ATOMIZER", "SHORT ATOMIZER" or "CHECK ATOMIZER". There is nothing to be worried about. For most people, such vaporizer issues come without a warning. It is normal to feel frustrated at such times but there is nothing to panic. Most vaporizer issues are trivial in nature. Any vaping enthusiast can figure out these problems and rectify them with some amount of understanding and practice.
Before we get into details about how to rectify these issues, let us have an understanding about the types of atomizers and their functional details.
Some important facts about Short Atomizer
In case of a warning display by source volt Battery that gives details as "Atomizer Short", the warning means that the Atomizer is short of its correct function. The simplest and most frequent issue in this case od he non connection of the central pin with the battery. It occurs most usually due to mishandling during the vaping usage.
The warning flash may differ in batteries without LCD screen and those with LCD screen. For non-LCD screen batteries, the operation button lights up upon pressing indicating absence of atomizer plug in. Batteries with an LCD screen will read "No Atomizer," or a variation of that depending on the battery.
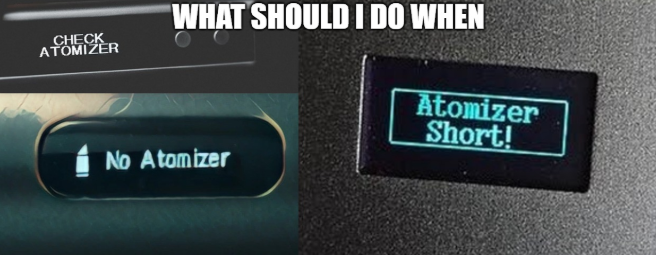
For batteries carrying an LCD screen, it will display "NO ATOMIZER" warning sign (or some other variation depending upon make and model).
Here is how to handle issues with Vape Mod's Short Atomizer
Most of the times it is the short circuiting of battery or tank that makes this message to appear on your error screen. Please go through the following investigation process to shortlist the probable causes of error display message.
- Please check that the tank resistance is set at the value of > 0.1 Ω
- Check that connections and atomizers are clean. Deactivate the battery and lock it before you proceed any further. Next, disassemble attachment from the atomizer. Immerse the assembly in a 91% solution of isopropyl alcohol for an hour.
- Remove the atomizer assembly from solution and let it dry out completely. Full dry is important to avoid inhalation of alcohol fumes.
In case the problem is still not sorted out, it is time to get a new atomizer.
How to replace the atomizer?
Any of the following is the sign of the time to change your atomizer:
- In case of non-LCD b 4 premium or SOURCE Batteries, three-time red blinking upon activation means an atomizer short presence.
- LCD screen carrying batteries display an error message of "Check Res!" or "Check Atomizer" upon activation.
Use a replacement atomizer to check for issues
In a worst-case scenario where none of the above-mentioned steps work, it is smart to use another atomizer for checking problems with the mod. Where the LCD screen is found to be displaying the same error messages, "Check Atomizer" or "Atomizer Short" then you have fault with the mod.
The only option left at this point is to pull out the 510 pin a bit. This may solve the problem. If this isn't work then it is time to get a replacement, if your warrant is still valid.
Handling issues related to Short Atomizer
In case of RTA and RDA Rebuildable atomizers, you need to make sure that the coil is not in contact with any metal component of the cap or the deck. Look for any cracks in the coil as well.
Check Atomizer error message, when do you see it?
This is the error message that you see under three conditions:
- The 510 electrode (pin) of the tank is unable to make a connection with the mod's firing pin
- Pre-built coil's base is not able to properly connect with the inside base of tank's 510 electrode
- When build deck and rebuildable atomizer (RBA) are not properly connected
In simplest possible terms, this message the result of some kind of disconnection.
Handling issues with Check Atomizer on Vape Mod
-
Make a disconnection and disassemble.
Make a disconnection between the tank and the battery / box mod. Next is the unscrewing of air pipe or glass atomizer tube from the tank base.
Disconnect the atomizer base from atomizer head (coil) by unscrewing it. The most appropriate cause of the "Check atomizer" error message is the problem of good connection between atomizer base and the coil. Most users don't realize this since this problem occurs very occasionally.
-
Cleaning of the atomizer vape
The First step is the cleaning of the interior of the atomizer vape. It is smarter to use the q-tip for this job. This is a necessary operation since the accumulation of the juice in the coil base can prevent it from proper contact at the base of atomizer.
Th second step is the cleaning of the coil base to ensure proper connection between the fully dry surfaces.
-
Assembling the parts
In the first step in assembling is the connection of the coil with the base of atomizer by screwing it tightly. Very often, the connection can loosen up without getting noticed and result in appearance of the message. After this, you can assemble the remaining pieces.
-
It's time to enjoy vaping
Now that the complete complements are assembled, it is time to trigger the battery and see if the assembly is working correctly. You can share the knowledge with your friends to help them enjoy hassle free vaping.
When do you see "No Atomizer" error message?
You view this message in case of bad connection or no connection between battery and Atomizer. The battery is unable to identify the atomizer installation. This is the cause of "No Atomizer" message display on OLED screen.
How do you rectify the problems associated with No Atomizer display message on Vape Mod
-
Tighten up the screwing of components
When the tank is not screwed in correctly or not screwed off properly or its alignment is incorrect; in all such cases the pins between the mod and the tank will not line up correctly. This will cause the disconnection of power in the device.
-
A case of tight or loose coil
Where the connection between the tank coil and the mod is too tight or too loose, in all such cases, you will experience the message displaying no atomizer or low atomizer.
-
Where you fill in excessive liquid
In such a case, there will be excess liquid between coil and pin. When you replace the coil and there is still liquid retention in the tank, it is likely to skill between the coil connection and coil base. It will generate "NO ATOMIZER" message display.
-
When it is time to change the coils
Over time, the coils tend to burn to the level where Mod or base can get defective. It can result in mod pin keeping fraction away from the tank pin causing the lack of connection. This can happen due to device dropping or a manufacturing fault.
-
Some problems with the pin
It may occur due to a broken or defective pin that doesn't screw in properly with the base. This can also happen due to bad manufacturing or a drop. In such cases, you may have to adjust or replace the pin. In case of certain devices, the pin may have settings that allow it to adjust itself with variable tanks. In other cases, you may have to screw it in manually to adjust with a certain tank. You may need professional assistance in certain cases.
You don't need to panic when you experience "Short atomizer", "Check Atomizer" or "No atomizer" messages on your device. You can easily fix these issues by adopting simple maintenance measures. However, safety must always come first. You must handle all maintenance task with due diligence and care. Where you don't feel confident or apprehensive, it is better to seek the assistance of professional.
Photo sources: pixabay.com, shutterstock.com, pexels.com, flickr.com, gettyimages.com, istockphoto.com, unsplash.com, freeimages.com, 500px.com, rgbstock.com